
My posts may contain affiliate links. If you click though and make a purchase, we might make a small commission, but at no extra cost to you.
Spring is on the way, y’all! We’re trying to brighten things up using this ribbon Easter egg craft! This is a great project to get the kids involved with. They can help cut ribbon or trace around the egg! No matter how you make it, it’s sure to bring a little Spring to your decor!
Supplies Needed to Make Your Own Ribbon Easter Egg
- 8×10 canvas from Dollar Tree (DT)
- Burlap fabric
- Solid colored fabric
- Various ribbons of choice
- Scissors
- Twine
- Felt egg cutout from DT
- Rotary cutter
- Hot glue gun and glue
- Twine carrots from DT
- Metal “Welcome” sign from DT
- Wooden button or other embellishment
First step is to cut 8×10 pieces from your burlap and solid colored fabrics. Afterwards, use the felt egg cutout to make your egg cuts. Later, you can use the fabric egg cutouts for another Easter project. For this one, you will need the outside cut only. See pictures for reference.


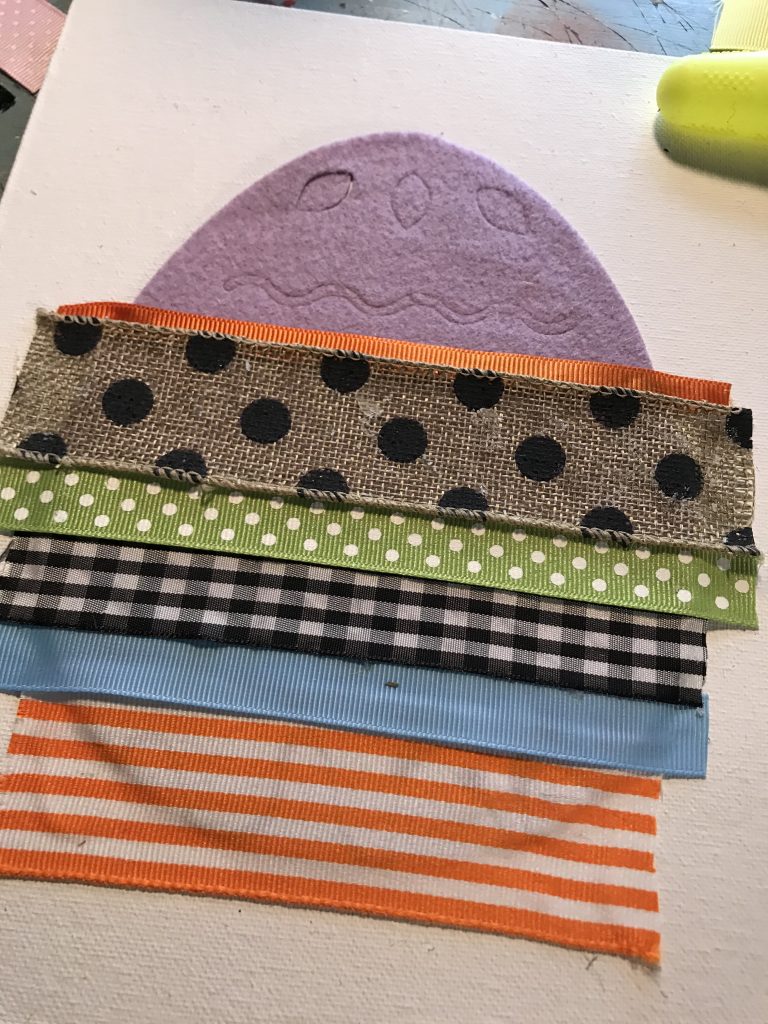
Now, using your felt egg cutout, cut your ribbon pieces to the desired length. Your ribbon should go past the edges of your egg. After your ribbon pieces are cut, glue the felt egg cutout onto your canvas to be used as your template to apply your ribbon. Make sure to center your egg.


Next up! Start creating your ribbon Easter egg!
Once your felt egg is centered and glued down, start gluing down your ribbon sections one at a time. I placed them randomly and overlapped them to fully cover the felt egg template underneath. Your ribbon will extend past your egg and this is what you want.


Next, you will glue your solid colored fabric onto the canvas, making sure to line it up around your ribbon Easter egg. The reason we add the solid color fabric is because the burlap is see through and we don’t want to see the ribbon that is extended past our egg. It also makes a pretty nice accent color. It will not be pretty, because you will most likely see your hot glue through your fabric. This is ok because you will be layering with your burlap next and covering your solid fabric anyways. You could use mod podge to apply the solid fabric which would look much cleaner, but it isn’t necessary for this.


Bust out the burlap!
After your solid fabric, glue down your burlap fabric the exact same way, lining it up to cover the solid fabric but not your ribbon egg.

Next fray your edges. Trim them if necessary.

Let’s make a bow for our ribbon Easter egg canvas!


The last thing to do is add optional embellishments. I added a button to my bow and a metal Welcome sign and twine carrots that I got from the Dollar Tree to my frame. What do you think?? I like it!


Our Ribbon Easter Egg Cutout Canvas Craft is Complete!

Let us know what you think in the comments below! Make sure to sign up for our free weekly newsletter that highlights our latest and greatest blog posts! We’re also on social media!
Love this Easter craft?
Pin it for later!

Thanks for visiting our blog and I hope you’ll be back!


Pingback: Decoupaged Easter Egg Candlestick - My Eclectic Treasures
Pingback: Bird's Nest Frame - Spring Farmhouse Decor - My Eclectic Treasures